Friday, December 14, 2018

How to fix Error: Could not find update-config.json. Run 'webdriver-manager update' to download binaries.

While running Protractor test if you see error:
[17:05:22] I/launcher - Running 1 instances of WebDriver
[17:05:22] I/direct - Using ChromeDriver directly...
[17:05:22] E/direct - Error code: 135
[17:05:22] E/direct - Error message: Could not find update-config.json. Run 'webdriver-manager update' to download binaries.
[17:05:22] E/direct - Error: Could not find update-config.json. Run 'webdriver-manager update' to download binaries.
    at Direct.getNewDriver (C:\automation\Demo\protractor-jasmine-typescript\node_modules\protractor\built\driverProviders\direct.js:63:31)    at Runner.createBrowser (C:\automation\Demo\protractor-jasmine-typescript\node_modules\protractor\built\runner.js:195:43)
    at q.then.then (C:\automation\Demo\protractor-jasmine-typescript\node_modules\protractor\built\runner.js:339:29)
    at _fulfilled (C:\automation\Demo\protractor-jasmine-typescript\node_modules\q\q.js:834:54)
    at self.promiseDispatch.done (C:\automation\Demo\protractor-jasmine-typescript\node_modules\q\q.js:863:30)
    at Promise.promise.promiseDispatch (C:\automation\Demo\protractor-jasmine-typescript\node_modules\q\q.js:796:13)
    at C:\automation\Demo\protractor-jasmine-typescript\node_modules\q\q.js:556:49
    at runSingle (C:\automation\Demo\protractor-jasmine-typescript\node_modules\q\q.js:137:13)
    at flush (C:\automation\Demo\protractor-jasmine-typescript\node_modules\q\q.js:125:13)
    at _combinedTickCallback (internal/process/next_tick.js:131:7)
[17:05:22] E/launcher - Process exited with error code 135
npm ERR! Test failed.  See above for more details.
PS C:\automation\Demo\protractor-jasmine-typescript>

You can fix this error by running command, by going into your root project directory:
node node_modules/protractor/bin/webdriver-manager update

Monday, November 26, 2018

How to Format code in Visual Studio Code

Auto-format your code in Visual Studio Code


If you want to auto-format your code in Visual Studio Code you have to enable the setting.
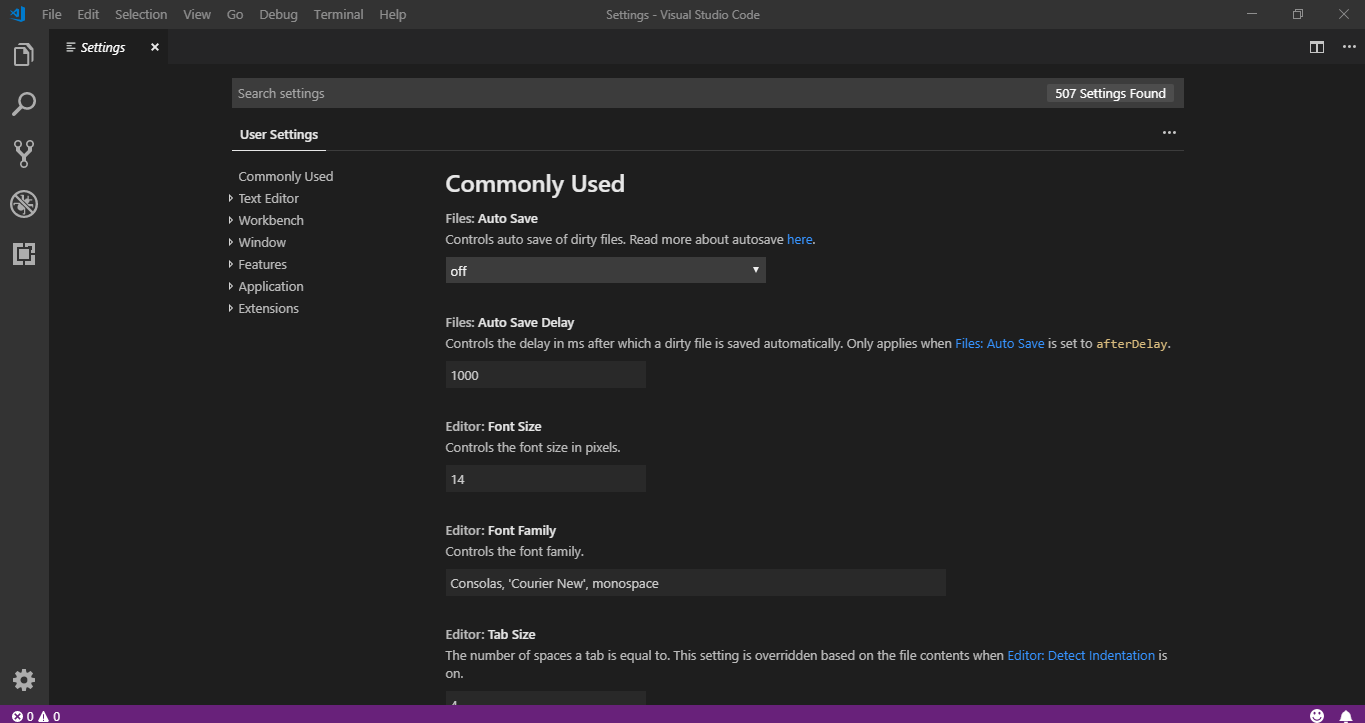
1.  Go to File > Preferences > Settings

2. In Search, bar enter formatOnSave

3. Checkmark the setting and it will automatically save the setting
4. Close and reopen Visual Studio Code

Format Document of code in Visual Studio Code

1. Double click and open TypeScript or JavaScript document
2. Right click on the document
3. Select Format Document option

Shortcut key to format document is Shift+Alt+F

Format Selection of code in Visual Studio Code

1. Double click and open TypeScript or JavaScript document
2. Select the code you want to format
3. Select Format Selection option

Shortcut key to format document is Ctrl+K Ctrl+F

You are Done!!!

Write first test in Protractor using TypeScript

Write first test in Protractor using TypeScript. We will start create simple folder structure so that finally we have automation framework.

1. Open Visual Studio Code
2. Right click on Explorer
3. Select New Folder option

4. Name the folder as specs and hit enter key

5. Select specs folder and right click
6. Select New File option
7. Name the folder as first.spec.ts and hit enter key

8. Lets write simple test

9. Create conf.ts in root folder and add these lines

10. Now, in order to run your first.spec.ts you have to Compiling your code, to do that you have to run command

This will compile the code and keep it in folder named temp and then it will start the test on browser.

Done!!!

Sunday, November 25, 2018

How to create tsconfig.json

The presence of a tsconfig.json file in a directory indicates that the directory is the root of a TypeScript project. The tsconfig.json file specifies the root files and the compiler options required to compile the project.

1. Open Visual Studio Code
2. Click on Terminal menu
3. Click 'New Terminal'
4. You will see that Terminal is open at the bottom-most screen of Visual Studio Code
5. Run below command


This will create a tsconfig.json file in your directory where you can define your configuration. VSCode will also start using this file once it finds it in your root directory.

6. We have to compile TypeScript file so that it converts them into JavaScript file. It will keep all the complied files in temp folder. We are not going to compile node_modules, so we have to exclude.

7. Finally you should update your tsconfig.json file as

Done!!!

How to create .gitignore in your project root directory

If you create a file in your repository named .gitignore, Git uses it to determine which files and directories to ignore, before you make a commit.

A .gitignore file should be committed into your repository, in order to share the ignore rules with any other users that clone the repository.

GitHub maintains an official list of recommended .gitignore files for many popular operating systems, environments, and languages in the github/gitignore public repository. You can also use gitignore.io to create a .gitignore file for your operating system, programming language, or IDE.

1. Open Visual Studio Code
2. Right click on project Explorer
3. Click New File
4. Name the file as .gitignore
5. Double click the file and open it
6. Enter enter the folder or file type which you want to ignore while checkin
7. Save changes

Done!!!

Reference:
https://help.github.com/articles/ignoring-files/
https://github.com/github/gitignore

Saturday, November 24, 2018

How to create a package.json file in project

Creating a default package.json file

To create a default package.json using information extracted from the current directory, use the npm init command with the --yes or -y flag

You can create package.json from the command prompt or directly from Visual Studio Code.

1. Open Visual Studio Code
2. Click on Terminal menu
3. Click 'New Terminal'
4. You will see that Terminal is open at the bottom-most screen of Visual Studio Code
5. Run below command

6. Default package.json file created will look something like

Updating package.json file

You can update the 'description' and 'author' as per your need manually or you can run below commands.

Setting config options for the init command


Saving npm dependencies in package.json file

1. Run below commands one by one so that it gets saved in package.json file and later it will be easy for us to install all dependencies by giving one commend.

2. If you run command npm install then it will install all the dependency in one go and it will save your time in typing individual command when you are deploying code on another system.
Finally you can update the package.json file as below

Done!!!

Install or Update WebDriver Manager

To install the required jar and driver for Selenium WebDriver when using Protractor automation too you have to install WebDriver Manager which downloads all the required jar and driver.

You can install WebDriver Manager from the command prompt or directly from Visual Studio Code. This is one of the powerful features which I like most in VSCode.

1. Open Visual Studio Code
2. Click on Terminal menu
3. Click 'New Terminal'
4. You will see that Terminal is open at the bottom-most screen of Visual Studio Code
5. Run below command

Done!!!

1. I would recommend installing WebDriver Manager and any other library in your root project directory.
2. Ignore any warning you see in terminal while installing WebDriver Manager. 3. If you see any error while installing WebDriver Manager then close Visual Studio Code and run webdriver-manager update command again.
Install TypeScript

TypeScript is a typed superset of JavaScript that complies to plain JavaScript. Any browser. Any host. Any OS. And it's OpenSource.

You can install TypeScript from the command prompt or directly from Visual Studio Code. This is one of the powerful features which I like most in VSCode.

1. Open Visual Studio Code
2. Click on Terminal menu
3. Click 'New Terminal'
4. You will see that Terminal is open at the bottom-most screen of Visual Studio Code
5. Run below command


Done!!!

1. I would recommend installing typescript and any other library in your root project directory.
2. Ignore any warning you see in terminal while installing typescript.

Install Jasmine

Jasmine is a behavior-driven development framework for testing JavaScript code.

You can install Jasmine from the command prompt or directly from Visual Studio Code. This is one of the powerful features which I like most in VSCode.

1. Open Visual Studio Code
2. Click on Terminal menu
3. Click 'New Terminal'
4. You will see that Terminal is open at the bottom-most screen of Visual Studio Code
5. Run below command


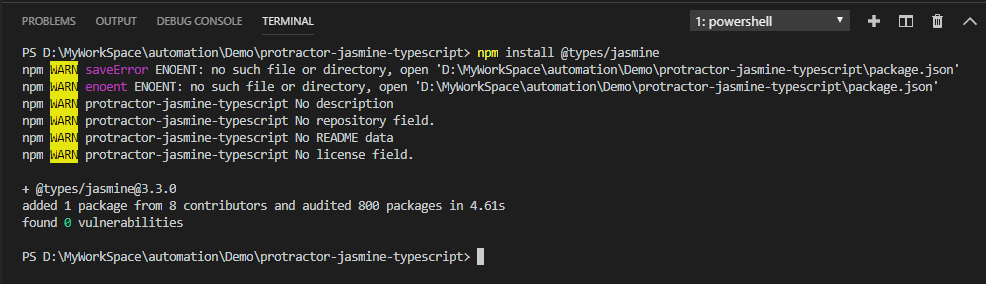
6. To install jasmine type so that you don't get type error for describe or it, run below command

Done!!!

1. I would recommend installing jasmine and any other library in your root project directory.
2. Ignore any warning you see in terminal while installing jasmine.

Friday, November 23, 2018

Install Protractor

You can install Protractor from the command prompt or directly from Visual Studio Code. This is one of the powerful which I like most in VSCode.

1. Open Visual Studio Code
2. Click on Terminal menu
3. Click 'New Terminal'
4. You will see that Terminal is open at the bottom-most screen of Visual Studio Code
5. Now create a folder in the location where you want to install the Protractor
6. Above step will create a folder named 'protractor-jasmine-typescript'


7. Open the folder created in Visual Studio Code
8. Now, if you want to install protractor globally then type the command

8. And if you want to install protractor locally in your project directly, then type the command


Done!!!

1. I would recommend installing protractor and any other library in your root project directory.
2. Ignore any warning you see in terminal while installing protractor.

Install Node.js

We will be using Node.js in end-to-end automation test design. This will help us in getting access of n-number of npm libraries.

1. Go to website https://nodejs.org

2. Click on 'Other Download' link

3. Download installer based on your system architecture.

4. Double click the installer and follow on-screen instructions to complete the installation.
5. Now, open Command Prompt and type node, if cmd does not throw any error then NodeJS got installed successfully.


6. You can also check the npm version by typing the command.

Done!!!

Install Visual Studio Code

If you are used to Visual Studio and fan of Microsoft then you will like this lightweight Code Editor which is absolutely free.

Very popular for JavaScript and TypeScript code editing. It has cool features which adds overall coding experience:

  • IntelliSense
  • Debugging
  • Built-in Git
  • Extensions
Now, let's go through simple installation instruction.

1. Go to website https://code.visualstudio.com/
2. Click on the Download button

3. It will scroll down the page for you to choose the installer and download based on your system architecture.

4. Double click the installer and follow the on-screen instruction to complete the installation.
5. Now, Launch the Visual Studio Code
VSCode-ui-protractor

Done!!!

You may also want to check out other popular code editors
  1. Atom: https://atom.io/
  2. Brackets: http://brackets.io/
  3. NotePad++: https://notepad-plus-plus.org/
  4. Sublime: https://www.sublimetext.com/
  5. VIM: https://www.vim.org/

What is Protractor?

https://www.protractortest.org/img/protractor-logo-450.png

Protractor is an end-to-end (e2e) test framework for Angular and AngularJS applications. Protractor runs tests against your application running in a real browser, interacting with it as a user would.

Protractor is built on top of WebDriverJS, which uses native events and browser-specific drivers to interact with your application as a user would.

Protractor supports Angular-specific locator strategies, which allows you to test Angular-specific elements without any setup effort on your part. Not just Angular application but non-angular application too can be automated

You no longer need to add waits and sleeps to your test. Protractor can automatically execute the next step in your test the moment the webpage finishes pending tasks, so you don’t have to worry about waiting for your test and webpage to sync.

Visit https://www.protractortest.org for more details.


Saturday, October 28, 2017

How to run Jenkins Server

1. Open CMD
2. Go to Jenkins folder (e.g. cd Jenkins)
3. Enter command: java -jar jenkins.war

Don't close the command prompt, as it will close the Jenkins server and automation schedule job will not trigger.

Sunday, April 30, 2017

How do I change Host file on my system?

On Windows 7 or Vista

1. Browse to Start > All Programs > Accessories.
2. Right-click Notepad, and select Run as administrator.
3. Click Continue on the UAC prompt.
4. Click File > Open.
5. Browse to C:\Windows\System32\Drivers\etc.
6. Change the file filter drop-down box from Text Documents (*.txt) to All Files (*.*).
7. Select hosts, and click Open.
8. Make the needed changes, as shown above, and close Notepad.
9. Save when prompted.

Wednesday, June 15, 2016

How to share Development Mobile App build with Testers or Stakeholders

It is difficult to share development Mobile App build with Testers or Stakeholders via Email or simple file sharing apps. To use more feature rich application follow below link:

Diawi: https://www.diawi.com/

How it works?
1. Upload the iOS or Android application.
2. Send the link to your testers, clients, friends or even use it yourself.
3. Open the link in the browser on the device and click on install.


Another application with similar working is:

HockeyApp: https://www.hockeyapp.net/features/

Tuesday, May 3, 2016

Coolpad Note 3: How to Remove MTKLogger from appearing on each boot

Below are the steps which will solve MTKLogger from appearing on each boot as well as “=>factory” text during boot.

1. Open Dialpad
2. Dial *#9527*#
3. Tap on DM,
4. Type RD personnel password: 54321
5. If DM Flag value is “1” choose "ok", DM mark will become "0"
6. If DM colour turn green from red, then choose “close”
7. Select “sure”
8. Reboot.
9. Now “=>factory” text will not be shown on booting and “MTKlogger” is gone from statusbar.


Note: I've tried these steps on Coolpad Note 3 device only.

Saturday, June 20, 2015

How to install Apache Ant on Windows

To install Apache Ant on Windows, you just need to download the Ant’s zip file, and Unzip it, and configure the ANT_HOME Windows environment variables.

Prerequisites: JDK should be installed in your system. See How to install JDK on Windows


1. Configure JAVA_HOME as Windows environment variable:


2. Download Apache Ant:


Go to Apache Ant official website, download the Ant binary zip file, for example : apache-ant-1.9.5-bin.zip, unzip it to the folder you want to store Apache Ant.


3. Unzip it to the folder you want to store Apache Ant:


For example: C:\apache-ant-1.9.5


4. Add ANT_HOME:


Add ANT_HOME as the Windows environment variable, and point it to your Ant folder.


5. Update Path:


Update Path variable, append %ANT_HOME%\bin at the end, so that you can run the Ant’s command everywhere.


6. Verification:


Go to Command Prompt, type ant -version and hit Enter key.

C:\Users\Dell5>ant -version
Apache Ant(TM) version 1.9.5 compiled on June 20 2015
Trying the default build file: build.xml
Buildfile: build.xml does not exist!
Build failed


If you see a similar message above, means the Apache Ant is installed successfully on Windows.

Reference: Installing Apache Ant

How to install JDK on Windows


There are few simple steps in downloading JDK and installing it.

1. Go to Oracle website:


2. Mouse hover on Downloads menu, under 'Popular Downloads' section click on 'Java for Developers'


3. Click on Java Platform (JDK) 8u45


4. You will be directed to 'Java SE Development Kit 8 Downloads' page


5. Click on 'Accept License Agreement' radio button


6. Based on your system architecture click on Windows x86 or Windows x64

x86 is for 32bit and x64 is for 64bit operating system


7. In my case I'm downloading Windows x64


8. Once download finish, double click on installer


9. JDK installation wizard will be opened. Click on Next to follow screen instruction and complete installation


10. Click on Close


11. Java installation completed. Hurray!!!


12. To verify if java is installed properly, open Command Prompt


13. Type command 'Java -version'


14.  Hit Enter key


 15. Java version will be shown in Command Prompt

Friday, May 8, 2015

The project: ABC which is referenced by the classpath, does not exist

I spent lot of time resolving this issue and saw many people are facing similar problem. So thought of sharing the solution. Hope it will help others.

If you are getting error 'The project: ABC which is referenced by the classpath, does not exist'

Solution #1:
1. Closed Eclipse

2. Renamed Workspace folder
3. Reopened Eclipse
4. Then 'Run launch configuration'

Solution #2:
1. Closed Eclipse

2. Reopened Eclipse
3. Give new Workspace name
4. Then 'Run launch configuration'